
(a) Kill selected thread:Activating this feature schedules the selected thread to be terminated once it has completed its current task. If the current task is an infinite loop then the thread will actually never terminate until the system shutdown.

(a) Kill selected process: (1st icon from left)
Selecting 1 or more of the currently running processes or shared Jvms in the monitor list and activating this function will terminate all of them in one go. Processes terminated in this manner is considered as abnormal termination.
(b) Create new process: (2nd icon from left)
Activating this function will generate a new native process on the desktop. Most users will use this desktop function as it is used to support native applications. Common Linux utility or application programs can be activated through this function including scripts. Users should take note that any native application activated apart from JUNK is outside of its control and may pose as a security risk on the Java desktop. Therefore users are discouraged from creating application processes using an Xterm or any such shells because the processes created by them are not under the management of JUNK. However, JUNK will still attempt to terminate all non-daemon processes when the user ends his/her desktop session. The facility for process invokation outside of JUNK is still supported only for the purpose of debugging.
(c) Create new shared Jvm: (3rd icon from left)
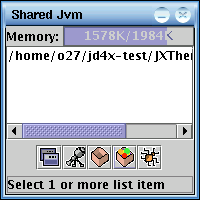
Activating this function will generate a new shared Jvm GUI interface on the desktop. Java users may wish to use this desktop function in which a JD4X Jvm GUI interface is generated to allow the user to load classes by their command. Once the JD4X Jvm GUI interface is generated, unlimited classes and application programs can be loaded into this same Jvm depending on the available system memory. All other Jvm specific features will then be made available through that Jvm GUI interface.


JD4X Jvm GUI Interface

(a) Execute classloader: (1st icon from left)
Selecting 1 or more of the currently loaded classloaders in the monitor list and activating this function will execute them in one go. If the selected classloader contains a class, that class will be executed. However, if the selected classloader contains a compressed jar file, then the main class defined in its manifest file will be executed. In addition, before each of the selected classloader is executed, the user will be asked on how to create the class object.
Invokation OptionsThere are three options available to the user:
(i) Default: This option is to create the class object using the default constructor of the class if any. If no default constructor or constructor that takes no arguments is found within the class definition, then an exception will be thrown.
(ii) Main: This option is to use the public static void main(String[] args) to create the class object if any. If no such method is found within the class definition, then an exception will be thrown.
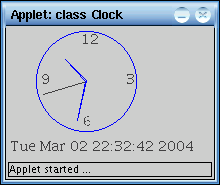
(iii) Applet: This option is to be used if the class file is an Applet or JApplet and needs to be loaded into an applet viewer. If the class selected is not an applet, then an exception will be thrown. The JD4X Jvm will automatically provide the needed applet viewer for the applet class and display the applet in it.
Applet Viewer

Once the user has decided on how the class object is to be created, the user will be asked again if any parameters are to be passed into the class object to be created, however this is only if (ii) Main was selected.
Paramter OptionA text entry dialog will be displayed for the user to enter the desired parameter options. If no parameters are desired to be passed to the class object, the user can simply click on the Ok button without entering anything. Finally, the class object is created in the Jvm.
(b) Class Monitor: (2nd icon from left)
Class MonitorSelecting only one of the currently loaded classloader in the monitor list and activating this function will produce a dialog box that allows the user to access two main class facilities. If more than 1 classloader is selected, only the last selected classloader will be used. The class monitor keeps track of the currently loaded classes in the selected classloader. This dialog currently has two functions available to the user:
(i) Execute class: (1st icon from left)
This function's procedure is similar to that of the classloader execution function except that instead of a classloader, each of the currently loaded classes can be individually selected for execution. Multiple classes can be selected in one go. However, subclasses cannot be executed. This facility allows users to individually test run specific loaded classes without having to test run the entire Java application program.
(ii) Reflect class: (2nd icon from left)
Reflector Dialog
Selecting 1 or more of the currently loaded classes in the monitor list and activating this function will produce a listing of all the details of the class definition. This option allows the user to inspect a loaded class or their subclasses for analysis purposes. It is often useful for investigating on undocumented classes before executing or using them.
(c) Unload classloader: (3rd icon from left)
Selecting 1 or more of the currently loaded classloaders in the monitor list and activating this function will unload them in one go. Unloading a classloader will remove all the class objects belonging to that classloader and if any of the class object at that moment is still under active use then an exception will be thrown whenever that class object is being referenced. This function does not remove the loaded class definition from the Jvm but instead it removes the objects created from it such that more memory can be made available in the Jvm at the user's command. This feature depends on the Jvm garbage collector implementation and the amount of memory released is not guaranteed.
(d) Class Loading: (4th icon from left)
Jvm File ChooserActivating this function displays a file chooser that allows the user to select the desired Java class or compressed jar file to be loaded from the local file system. Click on any of the files to select the desired class or jar file to load into the Jvm. Once the desired file has been selected, click on the Load button to initiate the loading process. Each classloader is maintained by a manager that list the paths where the class or jar was loaded from so that they can be referenced later by the user. If the selected file is a compressed Java jar file, then the main class defined in the manifest file and its needed subclasses will be automatically loaded by the JD4X Jvm. If the selected file is a class file, then the user will be asked to enter the package to which the class is declared to belong to.
Package OptionThe package information is then used to find and load the selected class file. Class loading is a function that allows the user to load files from arbitary locations on the file system including the trusted system loading directory, jbin. Any class or jar file found inside the jbin directory is considered secure for system loading and custom loading will deny any loading access from it, however, if system loading is required, this same function will automatically re-direct the loading to the system classloader. Therefore current users no longer need to worry about the two different kinds of class loading because the JD4X Jvm will handle it for them. JD4X separates the jbin directory loading from the rest of the file system because classes and jars loaded using system class loading is directly loaded by the system or bootstrip classloader which has more privilleges than the custom classloader. Classes and jars loaded using system class loading cannot be tracked except for the initial loaded class, which is needed for execution. Users should make full use of the jbin directory by placing commonly used Java desktop applications into that directory to allow easy and secure loading. The JBin support functionality uses this form of class loading.
(e) Text console of the Jvm: (5th icon from left)
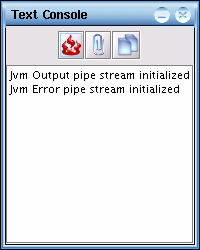
The Jvm text console is used for user debugging, exception tracing and message passing in the Jvm. All of the Java program output or message dumps either to the standard system output or error pipes are redirected to this terminal. This will allow the user to inspect and analyze any abnormally terminate Java program, a faulty program or any other debugging user messages sent by the Jvm or Java program. Refer to the text console section for the detail facilities available on each text console.
(f) Kill Jvm: (6th icon from left)
This feature is to kill the Jvm and terminate all classes running in its memory space, resulting in a normal process termination. Any Java application programs currently hosted by the Jvm will be terminated and their memory released. The JD4X Jvm will reconfirm with the user before proceeding to shutdown.
Jvm Termination Dialog
(g) Jvm Memory: (progression bar at the top)
This is merely an indicator of the total memory used by the Jvm at any particular time. The values are calculated in 1Kbytes or 1024 byte. Activating any of the JD4X Jvm features will produce the most updated memory usage within the Jvm.