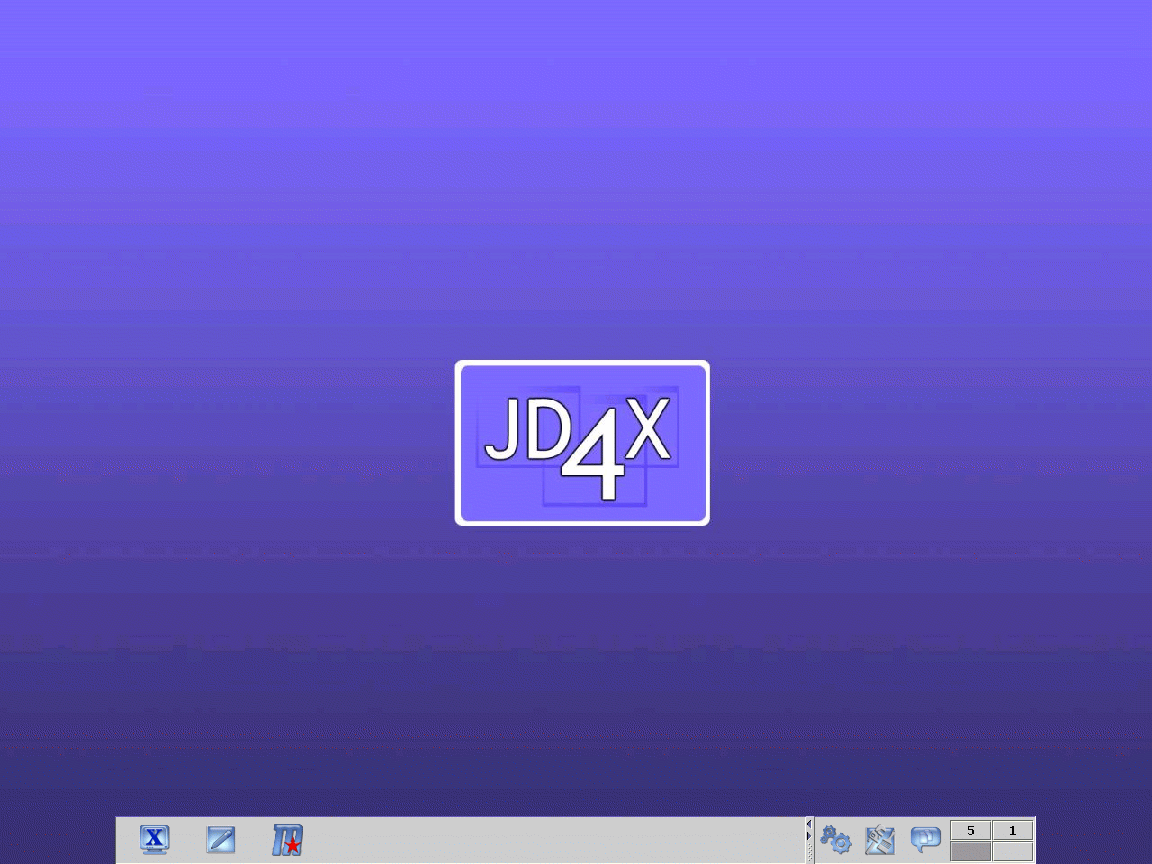
This section covers the terminology used in our user manual and the desktop components itself. The tutorial desktop has many features generic to the Java user and therefore most users will find it easy to comprehend. However, the desktop behavior is less conventional and may require a proper understanding of the current facilities in order to maximize your productivity when working on the desktop.
Desktop Task Bar
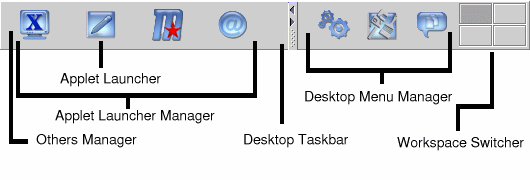
The desktop has a main task bar that contains all the menu and applets. The menu and the applets are both configurable through the specific configuration editors build to customize their use. By default the task bar is permanently mounted to the bottom of the desktop background. The desktop background is also known as the pseudo root window in the code. In short the task bar consist of four main managers. The Others Manager host all plugin module applets (eg. clock). The Applet Launcher Manager host all applet launchers. The Desktop Menu Manager host all plugin module menu. Finally, the workspace Switcher host all the workspace representations.
Desktop Task Bar (Fixed position)

Another important point to note is that
the components (menu and applets) in the task bar is shared among all
workspaces. Therefore configurations done to the task bar components in
any workspace will result in changes to all workspaces. This technique
is known as GUI caching which has the advantage of speed but
disadvantage of global modification. The tutorial desktop
implementation
will usually take the faster approach when there is a design dilemma of
this sort, unless the particular case involves exporting the code
design
for the purpose of reuse. Refer to the section on building
your own desktop for issues like this.
Desktop Menu Manager
This section is a brief discussion of the GUI interfaces to the default modules that are distributed by default with the default Java desktop. Those modules that choose to interact with the users through a desktop menu will have to provide a menu GUI interface which will be automatically added to the desktop menu manager during initialization.
Management Tools
The desktop menu manager consist of three main menu. The first menu is the JD4X Controller menu. The menu is JUNK's (Java User's Network Kernel) controller module. JUNK is a platform independent abstract kernel that holds the whole desktop together. It is a multi-threaded server that runs the entire Java desktop system including all its modules. This first menu is the module interface to the facilities provided by JUNK. It consists of all the management tools that manipulates the threads, processes, Jvms, plugins and the desktop session.
The user application menu allows the user to add, remove and configure native and Java applications on the tutorial desktop. Users can group sets of applications into other submenu under the Programs menu. Any configuration changes will be automatically saved when the user logout of his/her desktop session. The tutorial desktop comes configured with a set of default third party applications that are commonly used on the desktop. Depending on your contributions, these default set of applications will increase with time as JD4X matures. If there are not enough good Java applications available, common native Linux applications will be substituted in their place. We hope that in doing so, JD4X will provide an opportunity to gather talented (Java and Native) applications on the desktop.
For Your Consideration: If you have a Java application or wish to suggest one that you think is worth sharing with others, sent it to us. If we like it, we'll make it part of our default set of Java applications and share your talent with others. Refer to the section on how you can help for details.
Configuration Tools
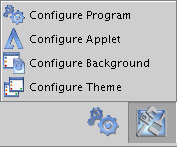
There are two minor modules distributed by default in the JD4X system. The first is the default Java window manager module which is the second popup menu in the Desktop Menu Manager. This menu consist of all the desktop configuration tools available for customizing the tutorial desktop.
The tutorial desktop supports multiple desktop workspaces. Each workspace is like a separate desktop instance such that users can organize their work on each workspace for a specific purpose. The task bar components are shared among all workspaces and does not need to be reconfigured separately, however, each workspace has its own separate icon manager, desktop background and task bar. Workspaces reduce the problem of multiple application programs cluttering a single screen space by allowing them to be spread across other desktop instances.
The tutorial desktop supports applet launchers on its task bar. Applets on the tutorial desktop can be anything that is within a Java panel such as a button, web applet or label. Applets can only be automatically added through the module plugin interface.
Icon Manager
An iconfied frame means that the application is no longer visible on the desktop but it is still running or active. A deiconfied frame means that the application frame is visible on the desktop. The icon manager is the desktop component that groups all the representation of an iconfied or minimized window or frame. It is found at the top (north) of the desktop workspace. Icon managers only contain the windows or frames that belong to their own workspace. It appears only when there is one or more iconfied frame within the workspace that it manages. It disappears when no frames have been iconfied or when all applications have been closed.
Any application that has been iconfied will have a representation of their instance in the icon manager. The application frames can be iconfied or deiconfied by simply clicking on its specific icon representation button. Each icon button consist of merely its application name in a shorter form, however, the content of what is displayed depends largely on what the application desires the icon manager to display. If the title on the icon button is too long to be displayed, it will end with the form "...". All deiconfied frames will have icon buttons that look depressed (dark gray box). All iconfied frames will have icon buttons that look undepressed.
Frame or Window Functions
Frames or windows are the main desktop components that host application programs. The application program itself excludes the border and title bar. The title bar and border is what is often referred to as a frame. There is a difference between a frame and a window. A window is merely a box on the screen while a frame consist of a border, a title bar, resizing functions, minimize function, close function as well as window moving functions.
The default JD4X windowing module (Moth) provides all its own frame support independent of any Java development toolkit. It uses the low level X facilities directly to avoid the toolkit layering that results in the sluggish behavior in Swing. With native support for X, the windowing module is able to provide its own frame behavior as well as its own custom look and feel. Below is a list of the build in frame facility supported in JD4X:
Currently, the tutorial desktop depends a lot on basic Swing with no additional Java theme added. However the actual implementation of a real user Java desktop can and should have configurable themes and looks. The JD4X project team is currently building another Gnome/KDE like window manager for JD4X which will include selectable Java themes and a full set of frame skins.
Desktop Menu Manager
This section is a brief discussion of the GUI interfaces to the default modules that are distributed by default with the default Java desktop. Those modules that choose to interact with the users through a desktop menu will have to provide a menu GUI interface which will be automatically added to the desktop menu manager during initialization.
Management Tools
The desktop menu manager consist of three main menu. The first menu is the JD4X Controller menu. The menu is JUNK's (Java User's Network Kernel) controller module. JUNK is a platform independent abstract kernel that holds the whole desktop together. It is a multi-threaded server that runs the entire Java desktop system including all its modules. This first menu is the module interface to the facilities provided by JUNK. It consists of all the management tools that manipulates the threads, processes, Jvms, plugins and the desktop session.
Controller Plugin Module Menu
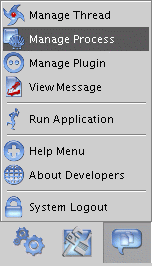

- Manage Thread - Manages all threads running in JUNK.
- Manage Process - Manages all processes and Jvms running in JUNK.
- Manage
Plugin - Manages all additional module plugins.
- View Message - Displays all message dumps (both standard output and error) in JUNK's runtime domain.
- Run Application - Execute a native process within JUNK.
- Help Menu - Launches this current user manual in either mozilla or netscape.
- About Developers - Displays the current active modules and their credits.
- System
Logout - Terminate the current desktop session.
Desktop User Application Menu
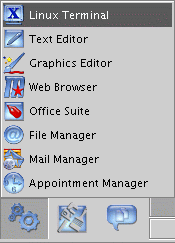

The user application menu allows the user to add, remove and configure native and Java applications on the tutorial desktop. Users can group sets of applications into other submenu under the Programs menu. Any configuration changes will be automatically saved when the user logout of his/her desktop session. The tutorial desktop comes configured with a set of default third party applications that are commonly used on the desktop. Depending on your contributions, these default set of applications will increase with time as JD4X matures. If there are not enough good Java applications available, common native Linux applications will be substituted in their place. We hope that in doing so, JD4X will provide an opportunity to gather talented (Java and Native) applications on the desktop.
For Your Consideration: If you have a Java application or wish to suggest one that you think is worth sharing with others, sent it to us. If we like it, we'll make it part of our default set of Java applications and share your talent with others. Refer to the section on how you can help for details.
Configuration Tools
There are two minor modules distributed by default in the JD4X system. The first is the default Java window manager module which is the second popup menu in the Desktop Menu Manager. This menu consist of all the desktop configuration tools available for customizing the tutorial desktop.
Window Manager Plugin Module Menu

- Configure Program - Allow users to custom configure the Programs menu.
- Configure Applet - Allow users to custom configure the Applet launcher manager.
- Configure Background - Allow users to custom configure the desktop background.
- Configure Theme - Allow users to
custom configure the desktop frame look.
The tutorial desktop supports multiple desktop workspaces. Each workspace is like a separate desktop instance such that users can organize their work on each workspace for a specific purpose. The task bar components are shared among all workspaces and does not need to be reconfigured separately, however, each workspace has its own separate icon manager, desktop background and task bar. Workspaces reduce the problem of multiple application programs cluttering a single screen space by allowing them to be spread across other desktop instances.
Desktop Workspace Switchers

Applet Manager
A desktop switcher is the desktop
component that represents a single workspace instance. The current
workspace in use is identified by the workspace switcher that has a
dark
gray box surrounding it. Users can easily switch between workspaces by
clicking on the desired switcher. The workspace switcher will also show
the current number of windows open on that particular workspace. If a
tutorial desktop configuration or management tool is launched within a
particular workspace, trying to reactivate them on another workspace
will have no effect. Each configuration or management program tool
has to be closed in their current workspace before they can be
reactivated onto a different workspace. The reason for this is that the
tutorial desktop tools are cached between workspaces or shared and
therefore can only appear in one workspace at any one time. Application
programs on the other hand are not cached and can be activate multiple
times on each workspace depending on their design. The desktop
background are separate for each workspace and can be configured
differently. Any configuration changes in any of the workspaces will be
automatically saved when the user logout.
Switching Applicaiton Frames between Workspaces
Depending on the different skin that the user select for the desktop frame, the user can also have the facility to switch applications between workspaces.
The application workspace switcher button is located at the top left hand corner of the frame. Clicking on the button will display a popup menu that shows all the available workspaces to switch to. The current workspace is always the option that is grayed out or disabled. Selecting any of the available workspaces will send that application to the selected workspace.
Switching Applicaiton Frames between Workspaces
Depending on the different skin that the user select for the desktop frame, the user can also have the facility to switch applications between workspaces.
Application Frame Workspace Switcher


The application workspace switcher button is located at the top left hand corner of the frame. Clicking on the button will display a popup menu that shows all the available workspaces to switch to. The current workspace is always the option that is grayed out or disabled. Selecting any of the available workspaces will send that application to the selected workspace.
The tutorial desktop supports applet launchers on its task bar. Applets on the tutorial desktop can be anything that is within a Java panel such as a button, web applet or label. Applets can only be automatically added through the module plugin interface.
Applet Launcher Manager

Applet launchers on the other hand means an application launcher. The
applet manager is the desktop component that groups all applet
launchers
that is displayed on the task bar. It enables the users to configure
their favourite application for an easy quick launch through the task
bar without having to search through the desktop Programs menu. Applet
launchers can be configured using the Applet
Editor.
Icon Manager
An iconfied frame means that the application is no longer visible on the desktop but it is still running or active. A deiconfied frame means that the application frame is visible on the desktop. The icon manager is the desktop component that groups all the representation of an iconfied or minimized window or frame. It is found at the top (north) of the desktop workspace. Icon managers only contain the windows or frames that belong to their own workspace. It appears only when there is one or more iconfied frame within the workspace that it manages. It disappears when no frames have been iconfied or when all applications have been closed.
Desktop Icon Manager

Any application that has been iconfied will have a representation of their instance in the icon manager. The application frames can be iconfied or deiconfied by simply clicking on its specific icon representation button. Each icon button consist of merely its application name in a shorter form, however, the content of what is displayed depends largely on what the application desires the icon manager to display. If the title on the icon button is too long to be displayed, it will end with the form "...". All deiconfied frames will have icon buttons that look depressed (dark gray box). All iconfied frames will have icon buttons that look undepressed.
Frame or Window Functions
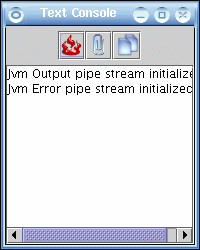
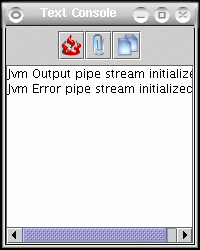
Frames or windows are the main desktop components that host application programs. The application program itself excludes the border and title bar. The title bar and border is what is often referred to as a frame. There is a difference between a frame and a window. A window is merely a box on the screen while a frame consist of a border, a title bar, resizing functions, minimize function, close function as well as window moving functions.
| Activated
frame |
Deactivated
frame |
 |
 |
The default JD4X windowing module (Moth) provides all its own frame support independent of any Java development toolkit. It uses the low level X facilities directly to avoid the toolkit layering that results in the sluggish behavior in Swing. With native support for X, the windowing module is able to provide its own frame behavior as well as its own custom look and feel. Below is a list of the build in frame facility supported in JD4X:
- When a frame is activated or selected for current use, the frame will gain focus and in turn pass the focus to the application that it host. To gain focus and activate a particular frame, click on the title bar or grid.
- If the frame is deactivated, it losses focus and the application losses its keyboard input facilities.
- Each of the four corners of the frame will allow it to be resized towards the direction that its corner is pointing to (north east, north west, south east, south west).
- Each of the four boundaries will also allow resizing towards their particular direction (north, south, east and west).
- To indicate that the resizing function is being activated, the cursor changes, showing the possible direction in which the frame can be resized. The user can resize a frame by simply clicking and dragging the frame towards the desired direction.
- A frame can be moved to the desired location by simply clicking on the title bar grid and dragging it to the desired location. Releasing the mouse button will finalize the frame location.
- A frame can be minimized or iconfied by clicking the first function button (from left) on the top right corner of the frame. The function button has an icon with a single line "_" at the bottom.
- A frame can be closed thereby terminating the application by clicking on the third function button (from left) on the top right corner of the frame. The function button has an icon with an "X" at the center.
- A frame can be maximized to fit the entire screen size by cliking on the second function button (from left) on the top right corner of the frame. The function button has an icon with a square at the center.
- A frame can have other facilities depending on the window manager by clicking on the function button (from left) on the top left corner of the frame. The function button has an icon with an "O" at the center.
- Clicking any function button will cause it to be highlighted. As long as the mouse button is release within the function button's window area, the function will be activated. If you click on the button but changed your mind about activating the function, just move the mouse outside the function button's window area and the function will not be activated.
Currently, the tutorial desktop depends a lot on basic Swing with no additional Java theme added. However the actual implementation of a real user Java desktop can and should have configurable themes and looks. The JD4X project team is currently building another Gnome/KDE like window manager for JD4X which will include selectable Java themes and a full set of frame skins.